After installing WordPress, most of us often take it for granted that it’s easy for everyone. If you are new to WordPress, it can be a bit challenging to fully grasp how to begin. Luckily, there are many tutorials online to help you out, but I’ve decided to take you through some steps that I always do myself.
After Installing WordPress!
This article will guide you through the most important things to do before you begin setting up your website. We will skip ahead about learning the dashboard and save that for a series of getting familiar with the basics of WordPress. In the meantime, let’s go through 12 important things to do before you begin building your website.
(1) Cleaning Up the Admin Area
After installing WordPress, you will be greeted with a dashboard of various info elements, settings, and more.
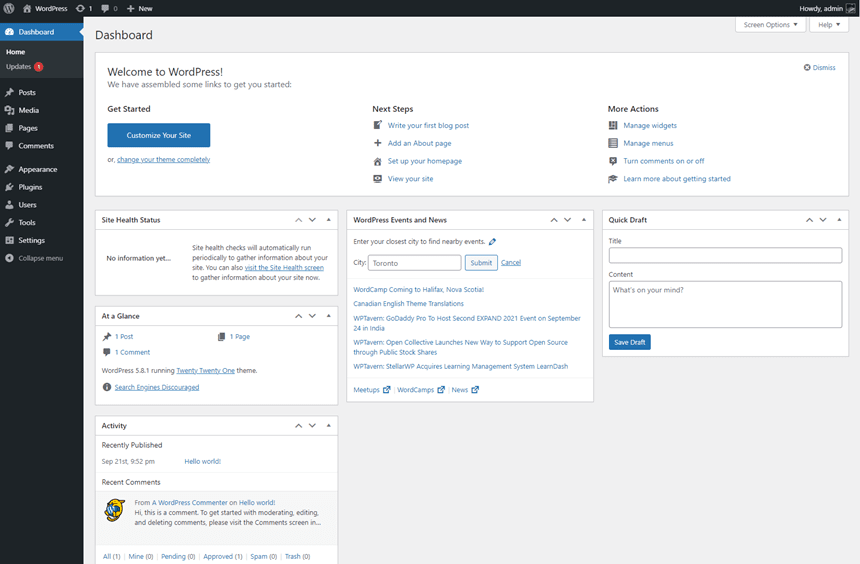
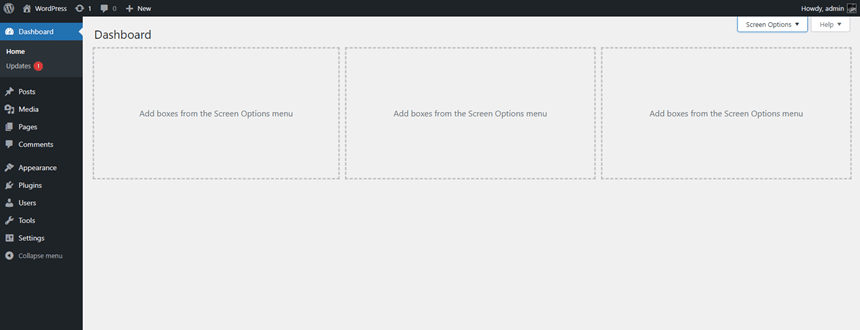
Before you begin making your website, I recommend keeping everything organized and cleaned up. Decide what you want to show or hide by clicking on the top right tab “Screen Options” and then uncheck all the boxes to hide what you don’t need.

Once you’ve made your choices of what to show or hide, you won’t be distracted when logging into your dashboard. For myself, I like to keep it clear of anything:
(2) Remove Installed WordPress Content
When you install WordPress for the first time, you get one page and one post (with comments) by default. I can guarantee that you don’t want “Hello World” showing up on your own website, so let’s get rid of this stuff!
I like to do this in the following order:
- Comments – Delete the comment that you see by sending it to the trash. Before you leave, click on the Trash link and then click on the Empty Trash button in the toolbar area.
- Posts – Next, I will delete (trash) the “Hello World” post. Just like the comments, go to the Trash link in the toolbar and then Empty Trash. NOTE: If you delete the post first before the comment(s), the post gets deleted, but the comments stay in the database.
- Pages – Now you can delete the “Sample Page” by sending it to the trash. Just like above, go to the Trash link and then click the Empty Trash button. You can also delete the “Privacy” page if you plan to create your own, or you can keep it and then edit the page with your own privacy policy.
(3) Remove Plugins & Themes
I don’t know about you, but why keep things in your WordPress setup that you won’t use or need? It just means more distractions, especially when you get update notifications for stuff you don’t use.
- Plugins – Go to your plugins screen and delete the “Hello World” plugin; which in my opinion is useless. Deleting it will permanently remove it–there is no Trash to go into. There might be the WordPress Importer and Akismet plugins installed, but I would recommend keeping them there.
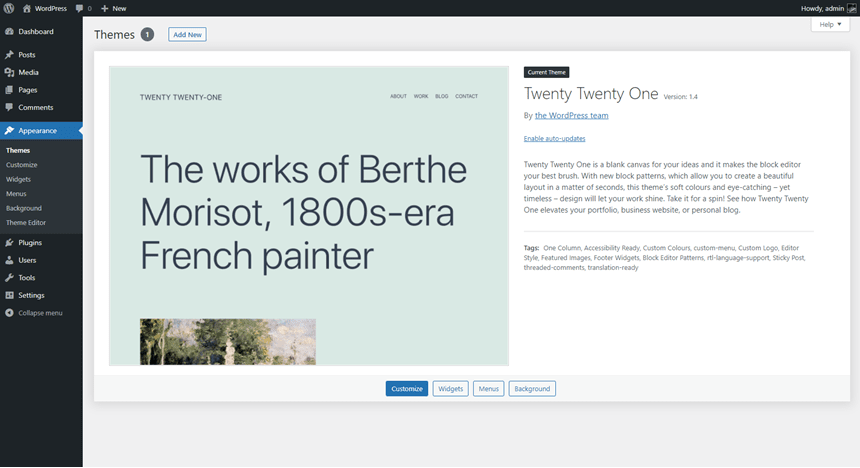
- Themes – Now we can move into the themes section and delete themes that you don’t need. Hover over a theme screenshot and then click on the More Details button and then Delete in the lower right of the popup window. IMPORTANT: Keep the latest default theme in place! At the time of writing this, it should be the “Twenty Twenty-One” theme, which is the one active after installing WordPress.
For the theme, you should just see something like this once you’ve deleted unnecessary themes:
(4) WordPress Settings
Now it’s time for you to head over the Settings, beginning with General Settings. I’m only going to touch base on these, but if you want the full detailed descriptions of your dashboard options and settings, check out the official WordPress Admin Screen info.
- General – Everyone will have their preference as to what they want to be set. Begin with the Site Title and Tagline. When you get to the Time setting, I like to do a custom version with Fj,Y in the field, which will give me a date format like Preview: September 22, 2021
- Writing Settings – There are just a few here. The default category can be left as-is. In a series guide that takes you through greater detail of the WordPress dashboard, I will talk about the “Uncategorized” category name.
- Reading Settings – Again, just a few here, but while you are preparing your WordPress and building your website, I would recommend checking the box next to Search Engine Visibility and clicking Save. Just remember that when your website goes live, make sure you uncheck that box!
- Discussion Settings – Go through each item carefully and based on your own preferences, choose which is important to you.
- Media Settings – Media settings will be a very personal preference. Most will keep them as they are, often forgetting or not realizing what happens here. I wrote an article back in time about media settings (which I will need to update), but it gives you an idea of why I personally do not like how these are set up. For me, I actually blank out every field and I also uncheck the box next to the “Organise my uploads into month- and year-based folders” under the Upload Files heading. However, I will let you choose what you want to do here.
- Permalink Settings – This will definitely be a personal preference, but here you can choose how you want your permalinks to look. Permalinks are basically the full URL to your sections, posts, pages, etc., within the browser’s address bar. When you click on a menu item or link, you will see how the permalink was created. My preference is to select the Post Name.
- Privacy – Remember earlier I mentioned deleting all the pages that get created after installing WordPress? The one Privacy page is what you can set here in these settings. I consider the whole privacy page setup optional, but you can decide how to set all this up. I do, however, recommend offering a privacy policy for your website visitors to read.
(5) Create a Second Administrator Account for Yourself
This is something most people do not know about, but it can be a lifesaver. If your one and only administrative user account becomes wonky or corrupted, you’re locked out! The only way to get back in is to go into your database! I don’t recommend that unless you know what you are doing.
I wrote an article about why you should create a second admin user account. Actually, if I were to list these tips in order of importance, this would be #1. Once created, this becomes your backup admin account. IMPORTANT: Make your password for this extremely complicated, like 16 or more characters with numbers, lower and uppercase letters, and symbols. You should do this for any password.
There is, of course, a slight security risk in having a second administrator account for yourself, but when you read the Create a Second Admin User Account article, you can see the pros and cons of it.
(6) Edit Your Profile
Although this is not really a big part of setting up and preparing WordPress for your website, it’s still something you should do.
Simply go to your profile in the admin area and edit your information; things like what name to display, writing a short biography of yourself, adding in a website, etc. Remember I mentioned creating a second administrator login? Do the same edit for that profile as well.
(7) Adding a Site Icon (and Logo)
When you go to your settings and review the General settings for your site title and tagline, you can choose to stay with a text-based website title or go with a logo. For a logo, you can set that up by going to the Customizer’s Site Identity tab.
A logo is secondary and not required. However, it’s recommended that you upload an image for your site icon. This is the little icon/logo that sits to the left of your website’s URL in the browser address bar–although, this will depend on the browser being used.
As an example, you can see the site icon for Rough Pixels as it appears in the Firefox browser’s tab.
(8) Add SSL to Your Website – HTTP to become HTTPS
Technically, this is not a WordPress thing, but more of establishing a secure-oriented website. When you visit a website that has a little padlock icon next to the URL address for any browser, it has an SSL certificate installed.
There are many ways of obtaining an SSL Certificate, either on its own, through your domain registrar, or your web host provider. Like mine, I use Rochen Hosting which offers a free Let’s Encrypt option. After enabling it for my domain, I now have that little lock icon next to the URL address (see the screenshot above for the site icon).
Having your website set up with an SSL certificate is more or less a requirement now, so make sure you get that done before you start building up your website.
RECOMMENDATION: I would recommend before even installing WordPress, that you get your SSL setup first. If you don’t, you will need to convert your website installation of WordPress to use HTTPS.
(9) Establish a Backup Solution
Time and time again, I keep telling people to get a backup solution in place. Too often you hear about a website crashing, getting hacked, or the site owner doing something, albeit, by accident. Some people have stated that they lost EVERYTHING!
There is value to your website with time and effort, themes or plugins that you have purchased, the domain cost, etc. If something goes wrong, you want to feel the comfort of knowing you have a full website backup to restore it.
I won’t go into a list of what to use or give recommendations; I will leave that to you. Just make sure you have something in place that will back up your database and website (everything). Every time something changes on your website, make sure you have a backup! Always expect the unexpected!
Also, do NOT leave your backups on your host server (as in, your website). Download them to your computer right after the backup is finished–preferably to a separate drive or flash drive (stick).
(10) Start Installing Plugins
The next thing is to begin installing the plugins you want to use. Just like a backup solution, I will leave the choice of plugins to you. Everyone’s needs will be different, so do your homework and only install the plugins you need!
- A backup plugin
- A security plugin
- and then whatever else you want to install…
One point about choosing your plugins, your first one will more likely be the backup plugin. The second one I would recommend is the installation of a security-type plugin. Make your website and admin as safe as possible.
(11) Find an Awesome Theme!
After you have everything else done, it’s time to look for a theme to really make your website stand out! As much as I would like to say use a theme from Rough Pixels…you have many theme sites at your disposal. Whether you seek out a free or premium theme, you want your website to look amazing and function with ease of use!
Still, check out our WordPress themes for your website!
(12) Configure & Set Up Your Theme Options
Once you have found the theme of your choice, it’s time to venture into the theme’s settings. From here, you can configure all the features and options that come with it. Based on what your needs are, you may not need everything enabled.
Is That All?
After installing WordPress and you are happy with everything, it’s time to begin creating your website’s content!
As you build your website, you may find there are a few more things that need attention. But for the 12 items listed above, I consider those to be the essential steps to preparing WordPress.
If you know of additional essential setups that we can add to the list, feel free to recommend them. Again, everyone’s website will be different, but what I have itemized above is a good starting point.